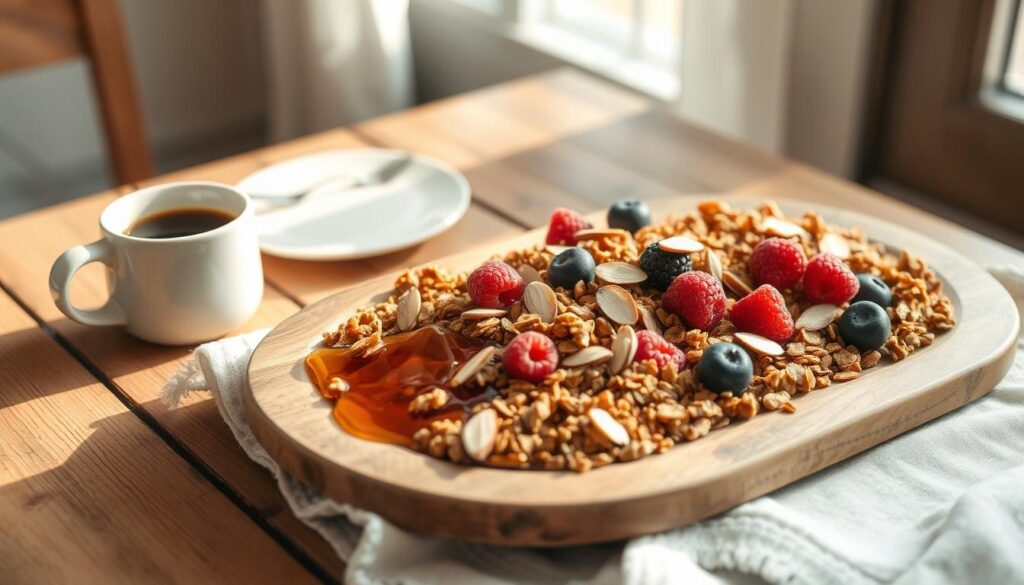
Start your day with a twist by adding maple syrup to your granola. This sweet liquid can turn your breakfast into a special treat. It adds a rich flavor and natural goodness to your meal.
Maple syrup does more than just sweeten your granola. It offers a complex taste that regular sugar can’t match. In Vermont and New Hampshire, skilled sugarmakers make this syrup from maple trees during the right seasons.
Exploring maple syrup in your breakfast opens up a world of flavors. The syrup’s caramel-like taste mixes well with oats, nuts, and seeds. This creates a delicious and healthy mix.
Chefs and home cooks love maple syrup for its unique flavor in granola. It caramelizes during baking, making the granola crispy and golden. This is something store-bought granola can’t do.
Maple syrup also adds nutritional value to your breakfast. It’s full of minerals like manganese and zinc. This makes your granola a nutritious and tasty start to your day.
Begin your maple syrup granola adventure here. It’s where old traditions meet new cooking ideas. Get ready to make your breakfast even better with a touch of natural sweetness.
Why Pure Maple Syrup Is the Perfect Natural Sweetener for Granola
Maple syrup is a top choice for sweetening granola. It makes breakfast not only tasty but also healthy. It’s a better option than sugary sweeteners because it’s natural and packed with nutrients.
Maple syrup is special because it’s full of good stuff. It’s not just sweet; it also has minerals and antioxidants. These help keep you healthy. So, you get to enjoy a tasty breakfast that’s also good for you.
Understanding Maple Syrup Grades and Flavor Profiles
Maple syrup has different grades, each with its own taste:
- Golden Color, Delicate Taste: Mild flavor, perfect for light granola recipes
- Amber Color, Rich Taste: Balanced sweetness with deeper maple notes
- Dark Color, Robust Taste: Intense maple flavor ideal for hearty granola blends
Natural vs Artificial Sweeteners in Breakfast Foods
Choosing maple syrup over artificial sweeteners is a smart move. It’s free from artificial chemicals and additives. It tastes clean and pure, and it even has minerals like manganese and zinc.
Maple syrup represents nature’s perfect sweetener – unprocessed, nutritious, and delightfully flavorful.
When making homemade granola, picking the right maple syrup grade is key. It can turn a simple breakfast into a delicious and healthy treat.
Maple Syrup Uses in Granola: Essential Tips and Techniques
Making tasty homemade granola with maple syrup needs skill and knowledge. The secret to great maple syrup in granola is knowing a few key techniques. These techniques turn simple ingredients into a yummy breakfast.
To use maple syrup well, you must measure and mix it carefully. Experts say these tips are essential:
- Use pure maple syrup for authentic flavor intensity
- Measure maple syrup precisely to balance sweetness
- Mix syrup with dry ingredients gradually
- Distribute maple syrup evenly across oats and nuts
Temperature is important when using maple syrup in granola. Baking at low heat prevents burning. It also lets the syrup caramelize naturally.
| Maple Syrup Type | Best Use in Granola | Flavor Profile |
|---|---|---|
| Grade A Light Amber | Delicate Recipes | Subtle, Mild Sweetness |
| Grade A Dark Amber | Robust Granola Mixes | Rich, Pronounced Maple Taste |
Try different maple syrup grades to find your favorite flavor in homemade granola. The way you mix ingredients can change the texture and taste of your breakfast.
The Nutritional Benefits of Adding Maple Syrup to Your Granola
Maple syrup is more than a tasty sweetener for your granola. It’s a nutritional powerhouse with essential minerals and antioxidants. These can boost your health. Knowing the maple syrup nutrition facts shows why it’s great for healthy recipes.
Pure maple syrup is not just sweet. It has a unique mix of nutrients that make it stand out. Researchers have found several key nutritional benefits:
- Rich in essential minerals like zinc and manganese
- Contains powerful antioxidants that fight cellular damage
- Provides natural energy without artificial additives
Minerals and Antioxidants in Pure Maple Syrup
Maple syrup is packed with minerals that make it a great choice for healthy recipes. Zinc supports immune function, and manganese is key for bone health and metabolism. The antioxidants in maple syrup protect cells from damage.
Glycemic Index Comparison with Other Sweeteners
The glycemic index of maple syrup is important to consider. It’s lower than refined sugar, causing blood sugar to rise slower. This makes it better for those watching their sugar intake.
Adding maple syrup to your granola does more than just sweeten it. It brings in nutrients that support your health and give you natural energy.
Basic Maple Granola Recipe for Beginners
Making a tasty homemade granola is easier than you might think. It can change your breakfast with just a little effort and lots of flavor.
- 3 cups rolled oats
- 1 cup mixed nuts (almonds, pecans)
- 1/2 cup pure maple syrup
- 1/4 cup coconut oil
- 1 teaspoon vanilla extract
- Pinch of salt
Creating the perfect granola is simple. First, preheat your oven to 325°F. Then, line a baking sheet with parchment paper.
- Mix dry ingredients in a large bowl
- Whisk maple syrup, oil, and vanilla together
- Combine wet and dry ingredients thoroughly
- Spread mixture evenly on baking sheet
- Bake for 25-30 minutes, stirring occasionally
The key to great homemade granola is baking it gently. Keep an eye on it to avoid burning and get a crispy, golden texture.
| Ingredient | Nutrition per 1/4 cup |
|---|---|
| Rolled Oats | 150 calories |
| Maple Syrup | 50 calories |
| Mixed Nuts | 170 calories |
Your homemade granola will last up to two weeks in an airtight container. Enjoy it with yogurt, milk, or as a snack!
How to Choose the Right Maple Syrup for Your Granola
Finding the perfect maple syrup can make your homemade granola amazing. Maple syrup adds depth and richness to granola, loved by many. It’s a favorite in both home kitchens and professional bakeries.
Understanding the different maple syrup varieties is key. The quality and grade of syrup affect your granola’s flavor and sweetness.
Dark vs Light Maple Syrup for Baking
Maple syrup has various grades, each with its own taste:
- Golden Color, Delicate Taste: Great for lighter granola recipes
- Amber Color, Rich Taste: Ideal for balanced sweetness
- Dark Color, Robust Taste: Best for strong flavors
Experts suggest using darker syrups for richer granola. They offer a deeper, more complex taste.
Storage and Shelf Life Tips
Storing maple syrup right keeps its quality and flavor. Here’s what to do:
- Keep unopened syrup in a cool, dark spot
- Refrigerate after opening to keep it fresh longer
- Use within 12 months for the best taste
Choosing and storing maple syrup well can turn your granola into a gourmet treat.
Combining Maple Syrup with Different Nuts and Seeds
Making delicious homemade granola is all about finding the right mix of nuts and seeds. Maple syrup is a great base for making tasty, healthy recipes. It adds sweetness and important nutrients.
Choosing the right nuts and seeds can make your granola stand out. Maple syrup’s natural sweetness pairs well with many ingredients. This creates unique flavors and textures.
- Almonds: Provide crunch and rich vitamin E content
- Pecans: Add buttery flavor and heart-healthy fats
- Pumpkin seeds: Contribute mineral-rich crunch
- Sunflower seeds: Offer protein and nutty undertones
Trying out different nuts and seeds lets you make your granola your own. The trick is to mix textures and flavors well. Maple syrup helps hold everything together.
| Nut/Seed | Flavor Profile | Nutritional Benefit |
|---|---|---|
| Walnuts | Earthy, slightly bitter | Omega-3 fatty acids |
| Cashews | Creamy, mild | Magnesium and protein |
| Chia Seeds | Neutral, slightly nutty | High fiber and antioxidants |
When making homemade granola, lightly toast the nuts and seeds first. Then mix them with maple syrup. This step boosts their flavors and adds complexity to your dish.
The magic of granola lies in discovering your perfect nut and seed combination.
Maple syrup is a natural glue that keeps nuts and seeds together. It also adds sweetness and depth to your breakfast. Feel free to experiment and create your own unique healthy recipes.
Seasonal Variations of Maple-Sweetened Granola
Exploring seasonal granola variations turns breakfast into a fun adventure. Maple syrup is a great base for making healthy recipes that match each season.
Creating granola that shows off seasonal flavors can make breakfast better. Maple syrup’s natural sweetness is perfect for mixing with different ingredients all year.
Summer Berry Blend
Summer is the time for fresh berries, which go great with maple-sweetened granola. Here’s what you need for a colorful breakfast:
- Fresh strawberries
- Blueberries
- Dried raspberries
- Sliced almonds
- Light maple syrup
The light maple syrup brings out the bright flavors of summer berries. Toasting the granola with a thin layer of maple syrup adds a nice crunch that goes well with fresh fruit.
Winter Spice Combinations
Winter is the time for warm, comforting breakfasts. A spiced maple granola is perfect for cold mornings.
| Winter Spice Ingredients | Flavor Profile |
|---|---|
| Dark maple syrup | Rich, intense sweetness |
| Cinnamon | Warm, aromatic notes |
| Nutmeg | Subtle, nutty warmth |
| Pecans | Robust, hearty texture |
These recipes turn breakfast into a seasonal celebration. They show how maple syrup can make morning meals unforgettable.
Creating Gluten-Free Granola with Maple Syrup
Making a tasty gluten-free granola is all about choosing the right ingredients and how you prepare them. Maple syrup is a great natural sweetener for those who need healthy recipes that fit their diet.
To make gluten-free granola, pick ingredients that don’t have gluten. You should use:
- Certified gluten-free rolled oats
- Raw nuts like almonds and pecans
- Seeds such as sunflower and pumpkin
- Coconut flakes
It’s important to avoid gluten contamination when making gluten-free granola. Buy ingredients from places that only sell gluten-free products. Also, use separate cooking tools to keep everything pure.
“The key to exceptional gluten-free granola is understanding your ingredients and their sources.” – Culinary Nutrition Expert
Maple syrup is perfect for binding your gluten-free granola. It adds natural sweetness and helps the ingredients stick together. Use pure maple syrup for the best flavor and a crispy texture when baking.
Try adding different nuts, seeds, and dried fruits to your gluten-free granola. Maple syrup makes it easy to create many variations of healthy recipes.
Temperature Control: Perfect Baking for Maple Granola
Making the perfect homemade granola needs precision and knowing about temperature. Baking granola is like an art. It mixes heat, time, and ingredients to get a golden, crunchy texture. This makes your easy granola recipe stand out.

Getting the temperature right is key to turning simple ingredients into a tasty breakfast treat. Professional bakers use consistent heat. This prevents burning and makes the granola crispy.
Preventing Burning and Achieving Golden Color
To avoid burnt granola, watch closely and use smart baking tricks. Here are some tips:
- Preheat the oven to 325°F (163°C)
- Use a light-colored baking sheet for even heat
- Spread ingredients in a thin, even layer
- Stir granola every 10-15 minutes while baking
Timing and Texture Guidelines
Getting the right texture in your homemade granola takes precise timing. Usually, an easy granola recipe needs:
- 25-35 minutes total baking time
- Initial bake without stirring: 15 minutes
- Gentle stirring to promote even browning
- Final 10-15 minutes of baking to get crunch
Pro tip: Take the granola out of the oven when it’s slightly golden. It will crisp up more as it cools.
Incorporating Dried Fruits in Maple Granola
Adding dried fruits to maple granola makes it a tasty and healthy breakfast. These fruits add flavor, sweetness, and important nutrients. They make your morning meal more exciting.
Choosing the right dried fruits can make your granola stand out. Here are some top picks for flavor and nutrition:
- Chewy dried cranberries
- Sweet dried blueberries
- Tangy dried cherries
- Rich dried apricots
- Robust dried raspberries
Timing is key when adding dried fruits to maple granola. Add them after baking to avoid burning and keep their texture. This way, your granola stays crunchy and flavorful.
“Dried fruits are nature’s candy – packed with nutrients and incredible taste!” – Culinary Nutritionist
Here’s a comparison of popular dried fruits for your breakfast:
| Dried Fruit | Calories per 1/4 cup | Fiber (g) | Antioxidant Level |
|---|---|---|---|
| Dried Cranberries | 123 | 2 | High |
| Dried Blueberries | 110 | 3 | Very High |
| Dried Apricots | 95 | 3 | Moderate |
Try mixing different dried fruits to make your maple granola unique and nutritious. It will keep your breakfasts exciting and delicious.
Making Clusters: The Role of Maple Syrup in Binding
Creating the perfect homemade granola is all about how maple syrup binds ingredients. It does more than just sweeten; it’s key to forming those crunchy clusters that make breakfast better.
Maple syrup’s unique structure makes ingredients stick together when baked. Its natural sugars caramelize, creating a sticky network. This holds oats, nuts, and seeds together in perfect clusters.
Oil-to-Syrup Ratios for Perfect Clusters
To get the perfect cluster texture, you need the right mix of ingredients. Here’s a good starting point for your homemade granola:
- 3 cups rolled oats
- 1/2 cup maple syrup
- 1/4 cup neutral cooking oil
- Pinch of salt
“The secret to great granola clusters is patience and the right maple syrup proportion.” – Artisan Baker
Cooling Techniques for Crunchier Granola
Cooling is key for that crunchy texture. Spread your maple syrup-infused granola on a cool baking sheet. Let it sit for at least 30 minutes without stirring.
Pro tip: Don’t stir the granola right after taking it out of the oven. Let the maple syrup do its magic as it cools and hardens.
Storage Solutions for Maple-Sweetened Granola

Keeping your homemade granola crunchy and flavorful is key. Smart storage is essential to keep it fresh and tasty. An easy granola recipe needs smart ways to stay fresh.
Choosing the right container is vital. Airtight containers are best to keep moisture out and keep it crisp. Glass jars or ceramic containers with tight lids are great choices.
- Select containers with airtight seals
- Store in a cool, dry place
- Keep away from direct sunlight
- Avoid humid environments
Temperature is important for storing granola. Room temperature is best for most recipes. Refrigeration can introduce unwanted moisture, ruining the crunchy texture.
Follow these tips for long-lasting granola:
- Let granola cool completely before storing
- Use clean, dry containers
- Fill containers only about 3/4 full to prevent crushing
- Check for freshness every week
Your maple-sweetened granola stays fresh for 1-2 weeks with proper storage. Remember to label your container with the date you made it.
“Great storage is the secret to long-lasting, crunchy homemade granola!”
Serving Suggestions and Breakfast Combinations
Maple-sweetened granola makes breakfasts both healthy and tasty. It turns simple meals into exciting ones. Try new ways to add this crunchy treat to your breakfast.
Maple granola is versatile and delicious. It’s all about mixing different textures and flavors. This way, you can enjoy the nutty, sweet taste of maple granola.
Yogurt Parfait Ideas
Make beautiful yogurt parfaits that are good for you and look great. Here are some ideas:
- Greek yogurt layered with maple granola and fresh berries
- Vanilla yogurt topped with maple granola and sliced almonds
- Coconut yogurt mixed with maple granola and chia seeds
Smoothie Bowl Toppings
Make your smoothie bowls stand out with maple granola. It adds crunch and nutrients. Here are some tasty options:
- Acai smoothie bowl sprinkled with maple granola
- Green smoothie bowl with maple granola and hemp seeds
- Tropical fruit smoothie bowl garnished with maple granola clusters
Pro tip: Always add granola just before serving to maintain its crisp texture and prevent sogginess.
Troubleshooting Common Maple Granola Issues
Making perfect homemade granola can be hard. Even skilled bakers face issues with maple syrup granola. Knowing common problems helps you get that crispy, tasty result every time.
Granola-making needs precision and care. Here are some key tips for your maple-sweetened granola:
- Uneven Baking: Spread ingredients evenly on a baking sheet and rotate halfway through cooking
- Lack of Crunchiness: Bake slowly and let it cool properly
- Burnt Edges: Use parchment paper and check granola often during baking
- Too Sweet: Use less maple syrup and balance with unsweetened ingredients
Temperature control is key for great homemade granola. Bake at 325°F (163°C) for even golden-brown results. Stir the mixture every 10-15 minutes to avoid burning and ensure even texture.
Managing moisture is also important. Dry wet ingredients like fresh fruits or coconut flakes before mixing. This stops soggy granola and keeps it crunchy.
Pro tip: Let granola cool completely on the baking sheet to develop maximum crispness.
Try small batches to improve your technique. Each change brings you closer to the perfect maple-sweetened granola that will please your taste buds.
Cost-Effective Tips for Using Maple Syrup in Granola

Making tasty granola with maple syrup doesn’t have to cost a lot. Smart shoppers can enjoy this natural sweetener without spending too much. Learning how to use maple syrup wisely helps home cooks make amazing breakfast treats.
Those watching their budget can follow a few key steps to save money:
- Buy maple syrup in bulk during peak seasons
- Purchase directly from local sugarmakers
- Compare prices between grade varieties
- Store syrup properly to prevent waste
Choosing the right maple syrup grade is important for both taste and cost. Grade A Dark Color maple syrup has a stronger taste and you need less of it. This means you can stretch your natural sweetener further.
“The secret to cost-effective maple syrup is understanding its concentrated flavor profile.” – Artisan Maple Producers Association
Using smart kitchen techniques can also help save maple syrup. Mixing maple syrup with other ingredients like honey or applesauce adds volume. It keeps the maple flavor strong. Using kitchen tools like squeeze bottles helps avoid spills and waste.
Looking for maple syrup from local producers can be cheaper than big brands. Farmers markets and cooperative stores often have good prices for high-quality maple syrup. This is great for making homemade granola.
Conclusion
Maple syrup in granola is more than just sweetening. It’s a journey that turns breakfast into a special treat. By learning about maple syrup grades and how to mix ingredients, you can make healthy recipes even better.
Granola with maple syrup is not just tasty. It’s also about experimenting with different ingredients. You can try new things like nuts, seeds, and dried fruits. This keeps your granola both delicious and good for you.
Making the perfect maple syrup granola is fun and rewarding. It’s for everyone, whether you’re new to baking or have been doing it for years. This guide helps you make breakfasts that are both tasty and healthy. Let maple syrup’s natural sweetness inspire your cooking.
Every granola recipe is unique, reflecting your creativity and care. Your recipe will be special because of the real maple syrup used. Start making your own maple syrup granola today. Enjoy the process of creating healthy, homemade breakfasts.